Tuesday, April 28, 2009
Good Tools !
I was looking through a gardening book and came across this awesome apron design--I just knew I needed to make one! I love to deadhead my flowers, but hate hauling around a bucket to put the clippings in. With this apron, I have a "bucket" right here on my waist! Boning holds the chute open at the top and Velcro keeps the chute in place. Just un-velcro, dump into a trash can and voila a happy gardener!
Here are photos of my "affordable" apron.I started out with a jean apron from GoodWill. I then took it apart. I kept the top part, but embellished it with pretty fabric. The chute is made from the skirt part of the apron and some of that cute fabric used earlier. I lined the chute with fabric from a laundry bag from the dollar spot at Target.
Total cost: about $ 2.00.
Monday, April 27, 2009
Friday, April 17, 2009
I'm Hooked!
Click pictures for larger view.


Thursday, April 16, 2009
Easter "With" Grandma
 Even though she's been gone for 10 years, I remember all the Easters we shared with her. In preparation for Easter this year, out came her rose china, her beautiful stem ware, and her ever present Sticky Buns! She is my dear Grandma Irene (the kids called her G.G.) Sitting down to brunch I could feel her warm hugs, her always smiling face and the unconditional love she exuded.
Caramel-Pecan Rolls
In a mixing bowl, combine 2 cups all -purpose flour and 1 pkg. active dry yeast. Heat 1 cup milk,1/3 cup butter, and 1 teaspoon salt just till warm(115-120); stir continuously.
Add to flour mixture; add 2 eggs. Beat at low speed on your mixer for 1/2 min.
Beat 3 min at high speed. Stir in as much of 2 -2 1/2 cups flour as you can mix with a spoon. On a floured surface knead in enough of the remaining all-purpose flour to make a moderately stiff dough that is smooth and elastic (6-8min total). Shape the dough into a ball in a greased bowl; turn once. Cover; let rise in warm place till double (about 1 hr). Punch down; divide in half. Cover; let rest 10 min. Shape and bake as instructed below.
Roll one half into a 12 x8 rectangle. Melt 3 tablespoons butter and brush half on dough. Combine 1/2 cup granulated sugar and 1 tablespoon cinnamon; sprinkle half of sugar mixture over dough. Roll up jelly style, beginning from the longest side. Seal seams.
Cut into 12 pieces, using dental floss; wrap around the roll, cross over keeping the strings close together, and pull in opposite directions.
Repeat with remaining dough. in a small pan combine 2/3 cup packed brown sugar, 1/4 cup butter and 2 tablespoons of light corn syrup; cook and stir till blended. Divide between two 9 x 2 1/2 round baking pans. Sprinkle each pan with 1/4 cup chopped pecans. place rolls in the prepared pans. Cover; let rise till nearly double (about 30 min.). Bake at 375* for 20 -25 min. Invert onto a serving plate. (Makes 24 rolls)
Enjoy!
This recipe comes from the Better Homes and Garden cook book.
Wednesday, April 15, 2009
purse / tote
Monday, April 13, 2009
Spring Totes


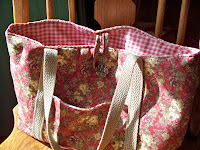
I had been looking for a fun spring project when I came across this tote tutorial on Homemade by Jill (a MUST VISIT blog). This simple design is very functional. As you can see, I've borrowed Jill's pattern and modified it a bit. Here are my first two attempts.
For the first bag, I used Orla Keily hand towels from Target (orange, brown, flower pattern) as was suggested by Jill. Perfect size--perfect texture. For the second, I made a trip to the fabric store for a vibrant floral. I lucked out and found a nice complementary polka dot fabric for the inside.
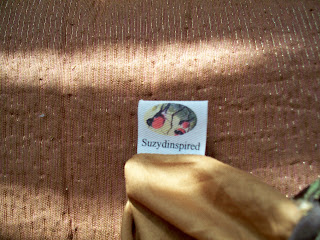
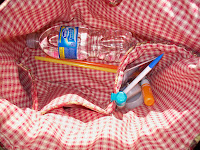
The only thing I felt this design was missing was pockets, so I added a couple to the inside of the second bag. I also tacked in a fob to hold keys (I hate when mine get lost in the bottom of my bag). And since I always enjoy embellishments, I decided to polish off the pieces with decorative tags. I took a cute flower tag from one of the Orla Keily towels and used it to give the chocolate brown bag a designer feel. For the other bag, I folded over a piece of pretty ribbon and fashioned my own tag.
I can't wait to make more totes!


