Showing posts with label crafting/tutorials. Show all posts

Tuesday, August 2, 2011

ANGRY BIRDS


Since Connor starts all day Kindergarten in a couple weeks, I won't be sitting for him regularly any more. I wanted to do a fun craft project. I had purchased a white tee shirt on sale at
Hobby Lobby and I was "itching" do do SOMETHING with it.

After discussing it with Connor we decided to paint an angry bird on it!
I googled "angry birds coloring page" and printed his choice out on plain paper.
Then placing it under a piece of freezer paper I traced the complete design on the ROUGH side to make a iron on stencil.
I did all the cutting and ironing and Connor did the painting.
I think he was pleased with his craftiness and I was too.


DIY under $5


Friday, June 3, 2011

Father's Day gift


Father's day is fast approaching and I helped my grandsons make their Daddy an amazing gift that I think he'll cherish for ever.
While browsing the web I came across
THIS site and adorable DIY for Father's Day and just had to make it. I just noticed we both used very similar fabrics! (It was the best "boy fabric" in my stash that didn't have robots, or dogs on it). I followed her instructions with a few changes. ( just make sure you have the hands arranged so they will fit the size opening you want BEFORE you iron them on and sew around them. I found the frame at T J MAXX on clearance. The frame was already matted and had a picture in it. I just ripped out the ugly picture and re-framed it with the adorable hand prints of my little sweeties! I also decided not to put the cute saying on the frame because it was not a "crafty " styled frame. This was a pretty easy project and one that is a real keeper! If you double click on the pictures you'll notice the boy's names and ages are written beside each wrist. *NOTE* if you have a little one, you may want to trace their hand while he's sleeping! just a thought. :) Please check out roots and wings co. she has wonderful tutorials!

Suzan


Thursday, May 5, 2011

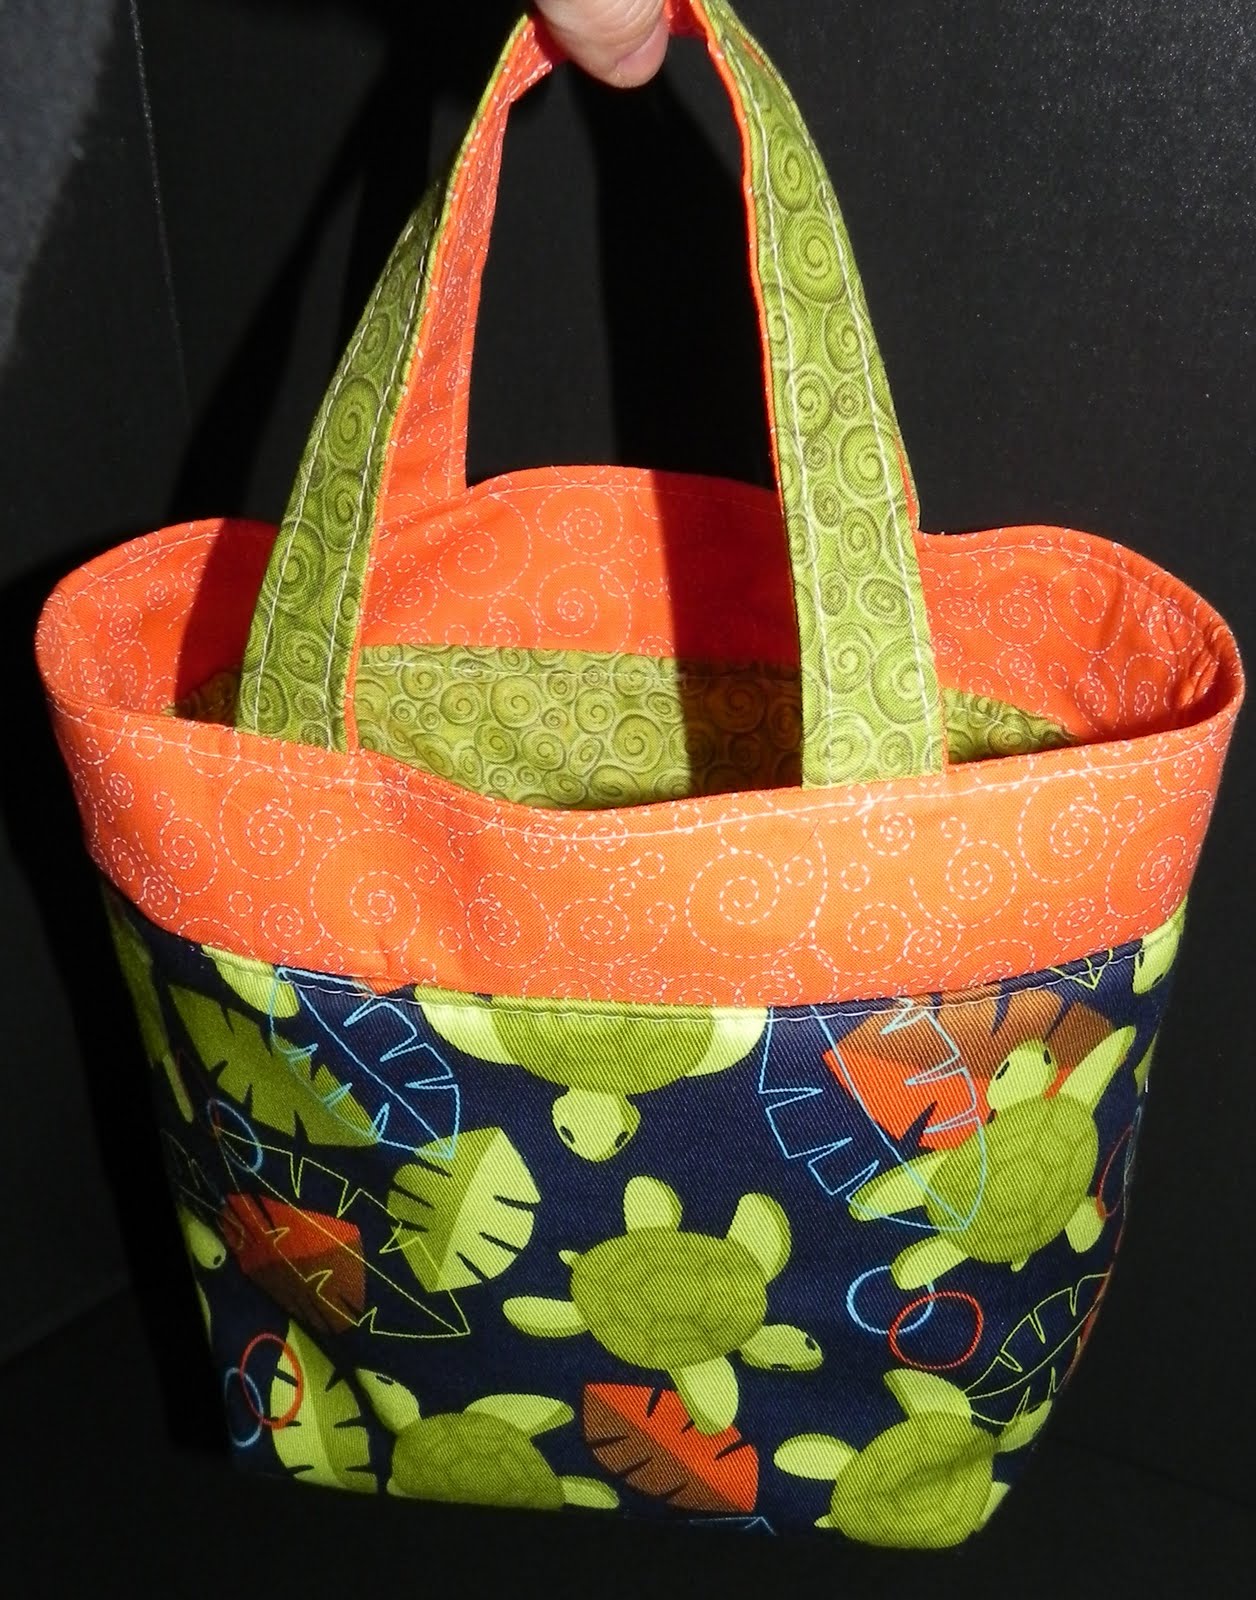
THE TURTLE TOTE LUNCH BAG


My oldest sister C. and her husband were here for Easter.
While here, C. saw my Etsy stuff and loved the turtle fabric I used on the bib set.

Always wanting to make something new, I asked what she'd like me to make her out of the adorable fabric. ENTER the "Turtle Tote" Lunch bag.
C. said that it had to be big enough to hold a frozen lunch box.

I found this perfect FREE Tutorial + a whole lot more at Pink Penguin. Thanks Ayumi! I made a few changes.

Instead of stabelizer I used insul-bright to keep the lunch cold.
I used rip stop nylon which is water resistant instead of the plastic coated fabric.
I also used the combined amount of outer and inner bag fabric size. (ie.. 18 1/2 x 12 1/2) Instead of two 9 x 12 1/2 because I used the same fabric and didn't need a seam.

Other than that I followed her WONDERFUL and EASY instructions and start to finish
2 hr.10min.
I've always loved the bags with the drawstring cover and thought ugh... I'll never be able to do that! I was way wrong. Ayumi's Tute was GREAT!!!

Saturday, August 14, 2010

Recovering

click for larger view

I've not been doing much crafting as of late.
I had a bone graft in my mouth and have felt pretty #$@*&%.

But the other night when I couldn't sleep I created this!

I printed out the letters in mirror first.

Then I traced the words on freezer paper.

I then hand cut out all the letters, ironed it to the onsie and painted.

I think Oliver looks adorable in it.

click the picture to view larger

Thursday, June 24, 2010

Post-it- note minibook tutorial

Here is the tutorial for the minibook as seen on a previous post of mine.
I think you will enjoy crafting these cuties.


* I find my self-healing crafting mat is especially helpful for this project, as it keeps table surfaces from getting damaged.

~~


mini-book supplies:

2 squares of 3 1/4" illustration board and one spine 3/8" x 3 1/4"
any 2 pieces of decorative paper, sized at lea
st 8 1/2 "x 5 "
any embellishments you'd like to add .


Use the template and any regular weight scrap book paper.
Trace and cut out the outside cover of your book.

Then cut out a liner of your choice, 3" x 6 3/4"


Glue front, back, and binding piece to the paper.

Then fold and glue the long sides down, then do the same for the shorter, end pieces.


If your design includes some type of ribbon around the sides, make sure that you bring it around to the inside before you glue in the liner. This keeps the book neat. The same thing goes for rivets and pins used for embellishment or as closures.


Paste in your paper liner.

Let the paper dry, then crease the insides of the spine just to make a clean fold.

Now get out all of your "bling," embellish, and have fun!


Some of my secrets:
A trick I use when gluing is to use an old magazine.This keeps my crafting surfaces clean and allows me to glue right up to the edge. Use a clean page for each glue up, then turn the page. Once the pages dry they can be used over and over again.

The easiest way to keep the cover shut is to use ouchless hair bands. These are just the right size! I usually tie on a charm or button to dress it up a little.


Making

Monday, February 8, 2010

Thanks mom

Socks Beautiful Socks!


I love the look of hand knit socks,
but the tiny yarn and 4 needles kept me
from knitting a pair of my own.

I made my mom this (sock sack) . It's for sock knitters!
find the tutorial here


and she made me these!! Aren't these beautiful?


THANKS MOM!